Beeswax candle and a note on waiting

There are few things as comfortable and meaningful as a lit candle. As I mentioned in one of my last posts, we are expecting a baby soon. Until a few months ago the feelings were mainly of excitement for the novelty, preparation and enjoying the pregnancy. Now the greatest feelings are patient waiting, fear and expectation. It is a feeling that seems precisely like the flame of a candle that is kept alight, fragile, waiting. Coincidence or not, this period coincides with winter, a time that encourages us to slow down, stop and wait, clinging to a small flame in the darkness of the season.

beeswax sheet candle

Enjoying a candle light

A few years ago I would have been the first to want to get through these cold grey months quickly. But since a couple years ago, I’ve learned to enthusiastically embrace the comforts of the season. I let myself be enveloped by the atmospheres and crafts I associate with winter. The winter kitchen, the cold walks, the moments catching the rare sun that peeks through, the knitting evenings, the series and movies to catch up on, the piles of books to read, the candles lit at dusk. All these things propel me into a state of hibernation with very particular aromas, light and textures. All of those seem to be captured throughout history, as shown in films, books and stories.

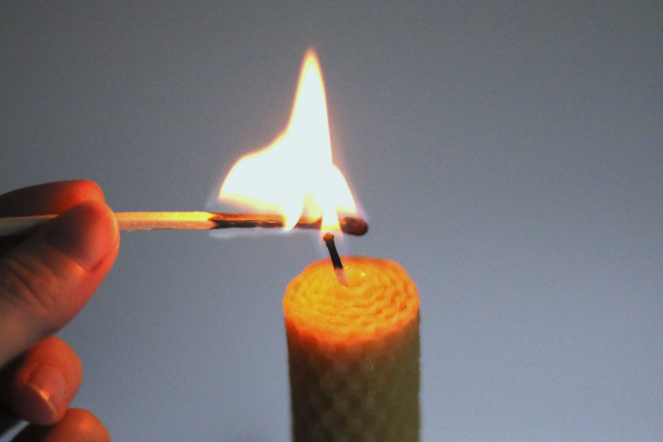
In an attempt to honour this feeling that seems to extend over time, I decided to make some candles. The easiest, but also the most beautiful, I have ever tried: beeswax sheet  candles.

beeswax sheet candle

Beeswax candles

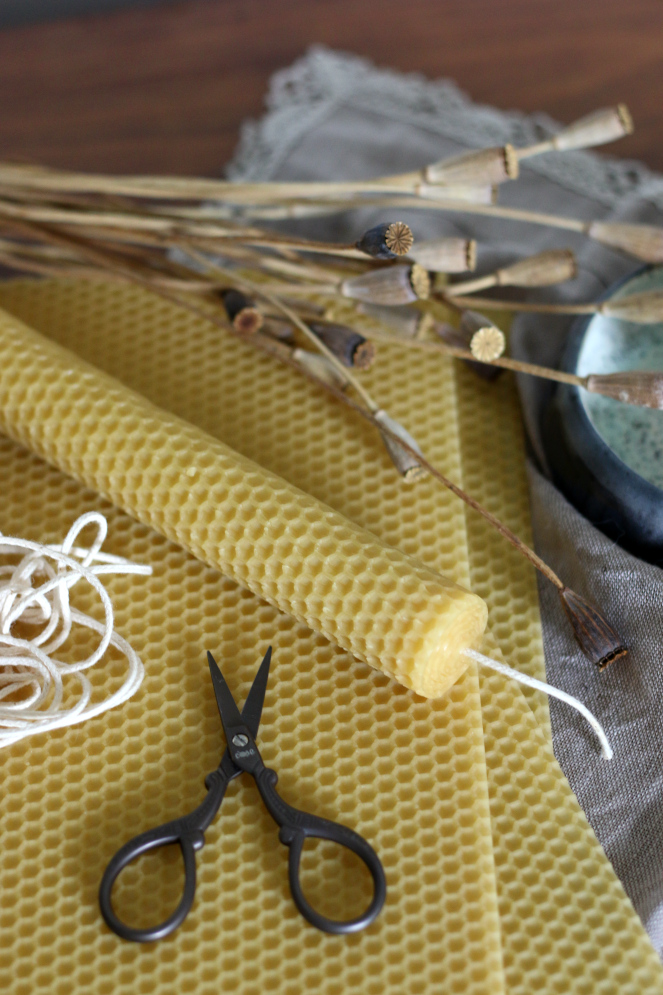
To make the beeswax candles you only need:

  • beeswax sheet 
  • wick
  • a hair dryer
  • beeswax sheet candle
  • beeswax sheet candle
  • beeswax sheet candle
  • beeswax sheet candle
  • beeswax sheet candle

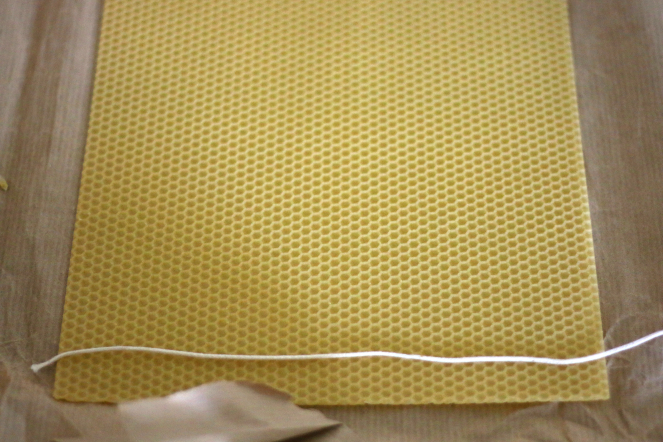
First, cut the beeswax sheet to the size of the candle you want to make. I used the width of an A4 sheet for the lenght of my candle and the whole length of the A4 sheet for the thickness of my candle. Any measurements will work. I don’t recommend making a very thick candle though because it creates tunneling effect. This is when the inside of the candle melts but the outside doesn’t follow along.

Then cut the wick about 2cm longer than the height of your candle. Overlap the wick over one end of the beeswax sheet equal to the height of your candle.

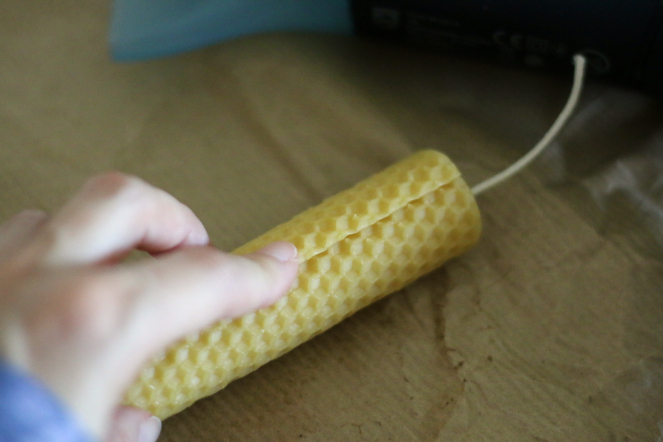
Using the hair dryer, slightly heat the end of the beeswax sheet that the wick is on until it is soft enough to be shaped. Start rolling the beeswax sheet over the wick paying attention not to break the wax sheet. You can heat it a little more to prevent it from breaking. Continue the heating and rolling process until the beeswax sheet is runs out.

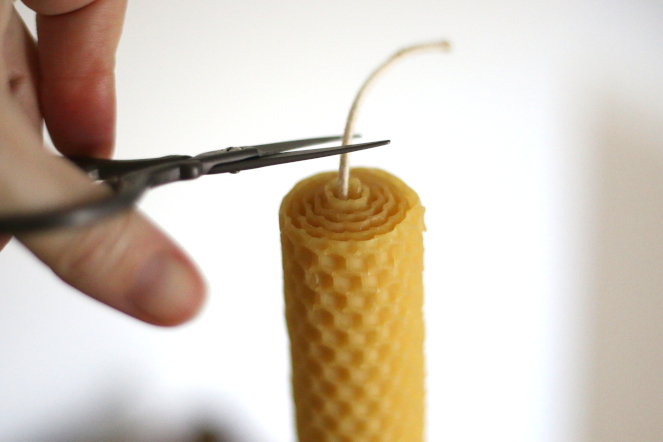
Cut the wick about 1cm from the end to be lit and close to the wax at the bottom end of the candle. And that’s it! You have the candle with the perfect colour, light and scent to embrace the last month of winter accompanied by a book, a cup of tea and under a blanket!

beeswax sheet candle
Continue Reading

Right now, these moments are not stories

the sweetest wait 11

We are welcoming a baby bear next year.

One day we will remember the story of wishing, growing and welcoming a baby into our lives. From an overly dreamer like me, it might feel different from the way it enter our feelings right now. I am sure I will fantasize it even more! But that is why I love to write about all the things I make (almost all the things) on this blog. It captures the essence of my experiences, feelings, learning progress and the way I see it right in the moment. It might change, but it reminds me the motivations that boosted me to get something done. That is why I call them stories: they might seem different from one person to another. But at least they try to capture my point of view.

These moments will all be stories one day

These moments we are living now will all be stories one day: our bodies matching together in a hug with a bump in the middle, the excitement in our eyes when you start to think about it, the complicity of something that is really shared, the air touching our skin when you know a secret, our voices and kisses trying to go inside, the finest nerves of our hands touching my bump expecting to be sensitive enough for something so tiny, the kicks that recall us, every single day, that there is someone inside. The urge to know him, the will to savoring him the closest he will be to us ever.

preserving moments
preserving moments
preserving moments

But right now, these moments are not stories

But right now, these moments are not stories. This is happening and I could swear, we are infinite. We are right in the moment. 

I wish I had the answer to capture it for the future. But no words seem right, I don’t seem eloquent to express, I don’t think I can even express it all with my body and face. I just keep getting more and more impressed with our human nature. Not even photos can capture everything. But we try, we always try to preserve things, even the things we know are invisible. That is what makes us humans. So I hope words, sounds, textures and images can gather something in the way. At least they can give us a hint to remember fully. 

Preserving moments

These photos were taken by Monica from @madlyyoursphotography on Instagram, on one of our special places to go and admire. There is a role to play from both sides: we don’t really know what to do to express it on a picture but we try to be ourselves. She, might do it everyday, but I think that you must enter in a fantasy world to fully capture other peoples intimate moments. 

preserving moments
preserving moments
preserving moments
preserving moments

One day, these pictures will become those old photographs

The photos were so much fun to take, and it gives me the best chills thinking that, one day, these pictures will become old photographs. I am living the moment, as much as I can, but something on these pictures makes me so fond of getting old and remember the days we were expecting our baby bear into our lives. 

Note: It might be controversial welcoming a bear into a rabbit’s hole. You see, that’s all part of the dream. 

Continue Reading

White Chocolate & Raspberry Sourdough Bread

My journey into sourdough bread started a few years ago. But, as you know, it was in 2020 that half the planet started making bread and I went back to my adventures into the sourdough world. 

The main reason why my first experiments, about 4 years ago, were not successful was because I used the method of starting a sourdough starter with the same book from which I got this recipe for a White Chocolate and Raspberry Sourdough Bread! It’s ironic but, it wasn’t until later that I realized what the main problems of my starter were, and that Paul Hollywood’s Bread book doesn’t address. Now that I’ve had an active sourdough starter for 2 years I feel confident in picking the book up again and test some of its sourdough starter recipes.

While I wouldn’t recommend it as a reference for establishing a sourdough starter from scratch, I do recognize a lot of value in the general methods for making bread and the recipes, or recipe ideas, described in the book. 

Can sourdough make sweet breads?

Although the connotation of sourdough is to make a sour bread (hence the name), a flavor that is actually very characteristic and close to many of the artisan breads we have in Portugal, this dough makes very interesting sweet breads. I’ve already experienced some and I can assure you that they are sublime!

So, as the first sample of my adventures into the sourdough world I present you a very original bread with white chocolate and raspberry that will open your horizons to the possibilities of this ancient way of making bread.

White Chocolate and Raspberry Sourdough Bread

This sourdough bread is an excellent alternative to a tea cake, and is worth it on its own but also toasted with a small touch of a very good butter. The key is to use fresh raspberries… which unfortunately are not in season at the moment (but they were when I photographed this bread) because frozen raspberries bring a lot of water to the bread dough. Happily (or unfortunately), you can buy fresh raspberries almost any time of the year these days. 

White Chocolate and Raspberry Sourdough Bread

There are lots of “basic” artisan sourdough bread recipes out there but I recognize the interest in sharing mine in an upcoming post as well as my adventures in creating a starter from scratch, maintaining it, and the most incredible secret recipes it allows! Sounds to me like we have a new line of posts here. Anyone else interested?

Continue Reading

Constellation quilt tips and materials

haptic lab constellation quilt

My progress on the haptic lab constellation quilt


My haptic lab constellation quilt has been is a work in progress since mid-2020. It began as a long-term project from which I have learned a lot! Luckily I ended up doing it during the challenging year of 2020 and the first months of 2021. It was a reflection project that valued the routine and supported some challenging moments.

After introducing you to my handmade quilt here, I made the sandwich of the top, batting and bottom layer. This is something that is usually done almost last in a normal quilting project. To this Sandwich I also added the constellation quilt pattern on paper over the top layer. This was the basis for embroidering the stars. I think it is no longer possible to buy this paper version. But I admit that it was a blessing to still be able to get it!

Guidelines machine stitching


As a matter of consistency of this constellation quilt, I chose to machine stitch the pattern guidelines. This allowed me to dedicate the effort of hand embroidery only to the constellations. It also allowed me to manage expectations and be creative in the use of materials while reinforcing the stability of the quilt.


After stitching the guidelines I dedicated most of the time to the most fun, yet repetitive part of this project: embroidering. I searched for many possible material options for each element. I though about making everything in the same color, about the proposed stitches, and I came to the following conclusion. Since I preferred the guidelines to go unnoticed, I stitched them using a thread of the same color as the top layer. Thus, I was able to give more emphasis to the stars and relax the complexity of the design.

Embroidering the constellations


Regarding the constellations, I must say that the process was somewhat revealing. In one hand I didn’t know how the materials were going to work because the final effect was hidden below the paper pattern. So, I embraced my imagination to predict the final effect and trusted the process!

For the stars I used a 6 strand silver embroidery thread. I separated 3 strands to use each time. This thread was a headache to work because the metallic thread wears out quickly while embroidering. I learned to use smaller portions of thread to decrease the risk of tearing it too much. In spite of that, I was excited to use this thread! I think the 3 strands give the “bulcky” effect that I was looking for without the intensity of a perlé thread! In addition, I confess that metallic perlé thread is not my favorite at all.

For the connecting lines between the stars I used the same thread in a light gold. A light gold goes better with the rest of the color palette. I was undecided between an interrupted or uninterrupted line. But as I finished the first constellations, I found that the uninterrupted line created less visual clutter in the overall design.

Names and the Milky Way


Two more groups of information were missing: the names of the constellations and the stars of the Milky Way. To make them I went for a soft perlé in two shades of blue. I used the lightest for the milky way stars, and the “not so dark” blue for the names of the constellations.

In the case of the milky way stars, I had to make an important decision. I found many references saying that the French knot stitch that the pattern suggested created some problems when tearing out the paper pattern. Many stitches fall apart at that time, even if the process is done carefully. In addition, the French knot is a delicate stitch, especially if the quilt is handled a lot. Now, those who know the headache of making French knots as many times as the project calls can imagine what it is like to have to redo them over and over. So I left my perfectionism aside (or did I actually embrace it …?) and replaced the French knots with a very delicate cross stitch.

Tearing off my constellation quilt!


The embroidery part of my haptic lab constellation quilt is finally finished! Now I have already started to tear and carefully remove the paper pattern to reveal the constellations. I still have to add some details as well as trim the edges and make the binding. So I will save a final revelation, full of good photos, for a next post! For now I show you this “sneak peak” of the satisfying moments of removing the paper quilt pattern that hid the embroidery of my haptic lab constellation quilt!

Continue Reading