Constellation quilt tips and materials

haptic lab constellation quilt

My progress on the haptic lab constellation quilt


My haptic lab constellation quilt has been is a work in progress since mid-2020. It began as a long-term project from which I have learned a lot! Luckily I ended up doing it during the challenging year of 2020 and the first months of 2021. It was a reflection project that valued the routine and supported some challenging moments.

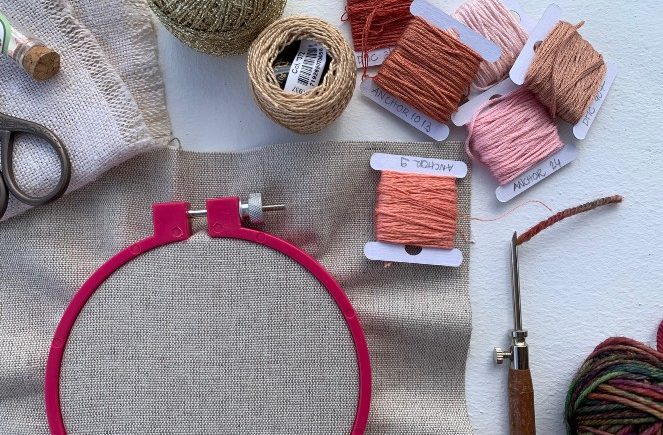
After introducing you to my handmade quilt here, I made the sandwich of the top, batting and bottom layer. This is something that is usually done almost last in a normal quilting project. To this Sandwich I also added the constellation quilt pattern on paper over the top layer. This was the basis for embroidering the stars. I think it is no longer possible to buy this paper version. But I admit that it was a blessing to still be able to get it!

Guidelines machine stitching


As a matter of consistency of this constellation quilt, I chose to machine stitch the pattern guidelines. This allowed me to dedicate the effort of hand embroidery only to the constellations. It also allowed me to manage expectations and be creative in the use of materials while reinforcing the stability of the quilt.


After stitching the guidelines I dedicated most of the time to the most fun, yet repetitive part of this project: embroidering. I searched for many possible material options for each element. I though about making everything in the same color, about the proposed stitches, and I came to the following conclusion. Since I preferred the guidelines to go unnoticed, I stitched them using a thread of the same color as the top layer. Thus, I was able to give more emphasis to the stars and relax the complexity of the design.

Embroidering the constellations


Regarding the constellations, I must say that the process was somewhat revealing. In one hand I didn’t know how the materials were going to work because the final effect was hidden below the paper pattern. So, I embraced my imagination to predict the final effect and trusted the process!

For the stars I used a 6 strand silver embroidery thread. I separated 3 strands to use each time. This thread was a headache to work because the metallic thread wears out quickly while embroidering. I learned to use smaller portions of thread to decrease the risk of tearing it too much. In spite of that, I was excited to use this thread! I think the 3 strands give the “bulcky” effect that I was looking for without the intensity of a perlé thread! In addition, I confess that metallic perlé thread is not my favorite at all.

For the connecting lines between the stars I used the same thread in a light gold. A light gold goes better with the rest of the color palette. I was undecided between an interrupted or uninterrupted line. But as I finished the first constellations, I found that the uninterrupted line created less visual clutter in the overall design.

Names and the Milky Way


Two more groups of information were missing: the names of the constellations and the stars of the Milky Way. To make them I went for a soft perlé in two shades of blue. I used the lightest for the milky way stars, and the “not so dark” blue for the names of the constellations.

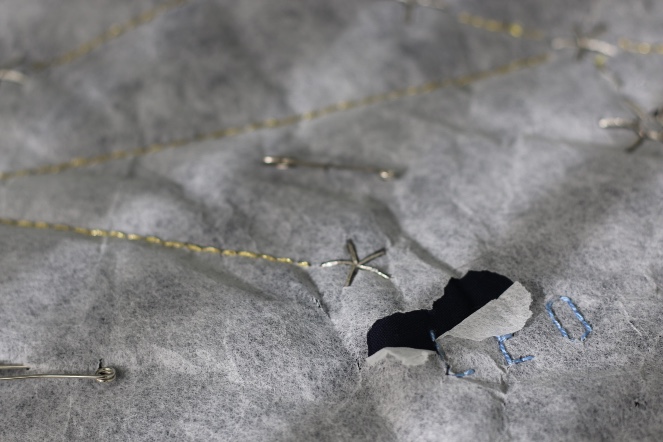
In the case of the milky way stars, I had to make an important decision. I found many references saying that the French knot stitch that the pattern suggested created some problems when tearing out the paper pattern. Many stitches fall apart at that time, even if the process is done carefully. In addition, the French knot is a delicate stitch, especially if the quilt is handled a lot. Now, those who know the headache of making French knots as many times as the project calls can imagine what it is like to have to redo them over and over. So I left my perfectionism aside (or did I actually embrace it …?) and replaced the French knots with a very delicate cross stitch.

Tearing off my constellation quilt!


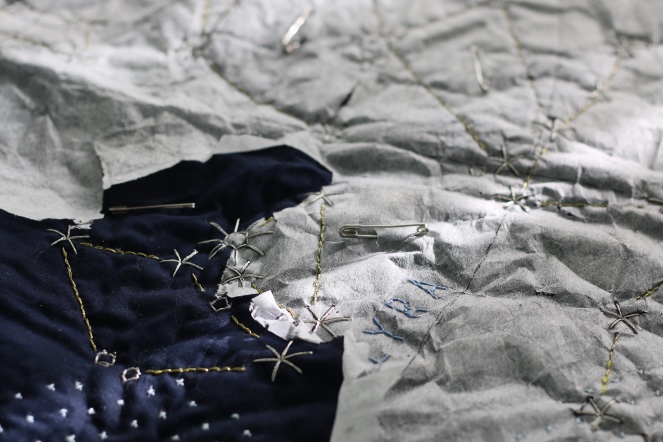
The embroidery part of my haptic lab constellation quilt is finally finished! Now I have already started to tear and carefully remove the paper pattern to reveal the constellations. I still have to add some details as well as trim the edges and make the binding. So I will save a final revelation, full of good photos, for a next post! For now I show you this “sneak peak” of the satisfying moments of removing the paper quilt pattern that hid the embroidery of my haptic lab constellation quilt!

Continue Reading

Framing two sleepy lions

(scroll for the English version)

Os meus leões adormecidos já têm destino!

 
Queria oferecê-los às minhas duas afilhadas mas fiquei indecisa sobre a melhor forma de os emoldurar. Encaixilhar, só mesmo sem vidro, para que o efeito da punch needle não se perdesse. Contudo achei que lhes dava um carácter mais sério do que eu pretendia para duas pequenas princesas. Pensei em fazer uma pequena almofada com cada um, acrescentando um tecido colorido para a parte de trás. Mas, apesar de uma almofada com punch needle me parecer uma ideia espectacular, com apenas 10 cm de diâmetro creio que os meus leões perderiam todo impacto numa almofada minúscula sem objectivo nenhum.

Depois de algumas ideias acabei por ceder à delicadeza dos bastidores porque me parece uma forma mais leve de enquadrar um trabalho são jovial e descontraído. Por isso comprei dois pequenos bastidores de madeira com o mesmo tamanho e apliquei-lhes os leões como se fosse bordar. Pelo verso, cortei o excesso de tecido deixando apenas o suficiente para o prender pela parte de trás do bastidor fixando-o. Depois pespontei, a uns 5mm da extremidade, a toda a volta e puxei o excesso de fio de forma a que a berma ficasse esticada pela parte de trás. Podia ter tapado o verso e a berma com outro tecido mas confesso que não tenho nada contra os versos dos bordados e até gosto de os ver (embora não de os analisar).


Acrescentei uma fita e agora estão prontos para oferecer. O bastidor é tão leve que pode ser pendurado nos mais diversos locais: janelas, puxadores, portas, enfim, onde quisermos. E mesmo que o queiramos colocar na parede não precisamos de nos comprometer com um furo: basta uma pequena tira de washi tape para o segurar!


My two sleepy lions have a home!

I wanted to offer them to my two sweet godchildren, but I was undecided on the best way to frame them. To use a regular frame I must do it without any glass, so that the punch needle effect is not lost. However, I thought it gave the lions a more serious character than I intended. I thought about making a small pillow with each one, adding a colorful fabric to the back. But despite the fact that a punch needle cushion seems like a spectacular idea, having only 10 cm in diameter, I believe that my lions would lose all impact in a tiny cushion with no purpose.

After some research I ended up going for the delicacy of the embroidery hoops because it seems to me a lighter way to frame a light little work. So I bought two small wooden embroidery hoops of the same size and applied the lions to them as if I was going to embroider. From the back, I cut off the excess fabric leaving just enough to secure it to the back of the frame and fix it. Then I stitched all around about 5mm from the edge, and pulled the excess thread so that the fabric was stretched from the back. I could have covered the back with another fabric but, I must confess, that I have nothing against the back of embroidery work and I even like to see it (not analysing it).

I added a ribbon and now these two sleepy lions are ready to offer. The framing is so light that it can be hung in different places: windows, handles, doors, wherever we want! And even if we want to put it on the wall, we don’t need to commit to a hole: just use a small strip of washi tape to hold it!


Continue Reading

Trying punch needle for the first time!

(scroll for the English version)


Experientei punch needle pela primeira vez!


Passei alguns dias longe de casa e, em período de confinamento que nos limita bastante as actividades, não quis deixar de levar comigo um pequeno projecto em que pudesse trabalhar. Então, resolvi que havia de experimentar o tão aclamado potencial da “punch needle” que já tinha comprado há uns meses atrás! Como no caso de outros projecto deste período de confinamento, vasculhei o meu stash e escolhi uma mão cheia de materiais para usar num pequeno bastidor de 10cm. Inspirei-me nos leões da Patrícia Brissos e dei-lhe o meu toque pessoal!
O resultado foi um pequeno leão adormecido que eu “penteei” usando a punch needle no seu comprimento máximo, de forma a criar pequenas argolas. Bastou-me acrescentar alguns traços em cores coordenadas e, passadas apenas algumas horas, o meu pequeno projecto estava pronto!


Desta primeira experiência surgiram outras ideias que quis experimentar: novo design, nova lã! Desta vez fiz o Rei Leão, com uma juba mais solene que faz sobressair a sua coroa dourada.


Apesar de não ter pretensão nenhuma com estas pequenas experiências gostei muito de usar a punch needle e acho que é uma técnica com muito potencial para pequenas peças como os meus leões, para almofadas, tapetes e até para fabulosos painéis decorativos! Estou cheia de ideias!


Quanto aos leões, num próximo post vou falar-vos do que resolvi fazer com eles!


Trying punch needle for the first time!


I spent a few days away from home and, while practicing my social distancing that greatly limits our activities, I decided to take a small project with me that I could work on while I was away. I wanted to try the highly acclaimed potential of the “punch needle” that I had already bought a few months ago! As in the case of other projects in this confinement period, I did not buy anything special. I just searched my stash and chose a handful of materials to use in a small 10cm hoop. I was inspired by Patrícia Brissos‘ lions and to add my personal touch! The result was a small sleeping lion that I “combed” using the punch needle to its maximum length, in order to create small rings. I just had to add a few more expressive stiches in coordinated colors and, after only a few hours, my little project was ready!

From this first experience, other ideas emerged that I really wanted to try: new design, new wool! This time I made the Lion King, with a more solemn mane that highlights his golden crown.


Despite having no intention with these little experiments, I really liked using the punch needle and I think it is a technique with a lot of potential for small pieces like my lions, for pillows, rugs and even for fabulous wall panels! I have so many ideas!


As for lions, in a next post I will tell you what I decided to do with them!
Continue Reading

Christmas time on the blog: the most amazing projects!

(scroll for the English version)


Eu sempre dedico o mês de Dezembro para fazer os presentes, as decorações, os postais e os embrulhos feitos à mão. Isto evita que me sinta esmagada pela confusão do Natal que considero adulterar por completo a essência da época. Quando olho para o blog compreendo que já fiz uma imensidão de projectos, alguns deles dedicados ao Natal. É assim que percebo os meus progressos, as coisas novas que aprendo e a minha capacidade para coisas, a cada dia, mais desafiantes. Deixo-vos com alguns dos meus posts favoritos entre decorações, presentes e outros projetos de Natal que eu adorei fazer!


I always dedicate the month of December to making gifts, decorations, postcards and handmade gift wrapping. This keeps me from feeling overwhelmed by the Christmas mess that I consider to completely corrupt the essence of this season. When I look back at blog arquives, I understand that I’ve done a lot of projects, some of them dedicated to Christmas. This is how I perceive my progress, the new things I learn, and my capacity for increasingly challenging new things. I leave you with some of my favorite posts among decorations, gifts and other Christmas projects I loved to make!
Continue Reading